Scrapagogo Retreat March 2013

I haven't updated my blog for such a long time but this weekend I went to the Scrapagogo Retreat with my friend Linzi and have come back all enthusiastic and ready to Scrapbook again!

The grounds of the hotel were gorgeous but I couldn't help but it was odd seeing spring daffodils covered in snow!


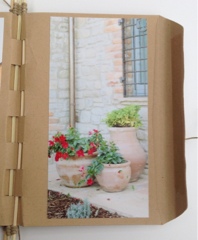
I will be updating my blog with all my makes from the weekend. This was a fantastic mini book class called Ties That Bind by Pam Thorburn. We used some kebab skewers and some brown envelopes and turned them into something so pretty!


The envelopes were folded and cut at regular intervals and the kebab sticks were then woven through, doesn't the spine look so pretty!


I used mine to document our summer holiday in Italy last year. 


As usual the kits comes with papers and embellishments and you just add your photos.


The envelope at the back is left unsealed for any loose pieces of memorabilia.


The front and back were covered with beautiful papers from MME Bluebell Range and Heidi Swapp.


It was a wonderful mini book which looks so beautiful and it was so much fun to relax and chat and scrapbook with such a great bunch of ladies!

Have a great week!

Tracey xx

School Christmas Cards

My son has finished school for christmas so last week, it was time to make the christmas cards for his friends. I didn't have loads of time but saw this on Pinterest and made my own version in Publisher. Here is how they turned out...


I made some baubles on the computer as I didn't have enough buttons and pearls to make all of the baubles on all of the cards. I imported the bows as an image and added the sentiment.


All that was needed was some glamour dust and some embellishments!


I rounded the corners with my corner chomper.


 My little fella gave them out with a father christmas chocolate telling everyone his mum had made his cards bless him:-)


I have made a rather special purchase to help me make my main christmas cards, more on that in my next post!

Hope your christmas plans are going well. I can't wait to spend some time with my little fella, the excitement for christmas is growing in this house by the day!

Tracey 
xx

Basic Grey Papers

I am really enjoying my Friday scrapbooking mornings at Autumn Cottage, I love catching up with my friend Linzi and having a chat with the other ladies there. This time I didn't have time to prepare anything so I grabbed some Basic Grey papers from the Wisteria kit and a photo and hoped for the best!


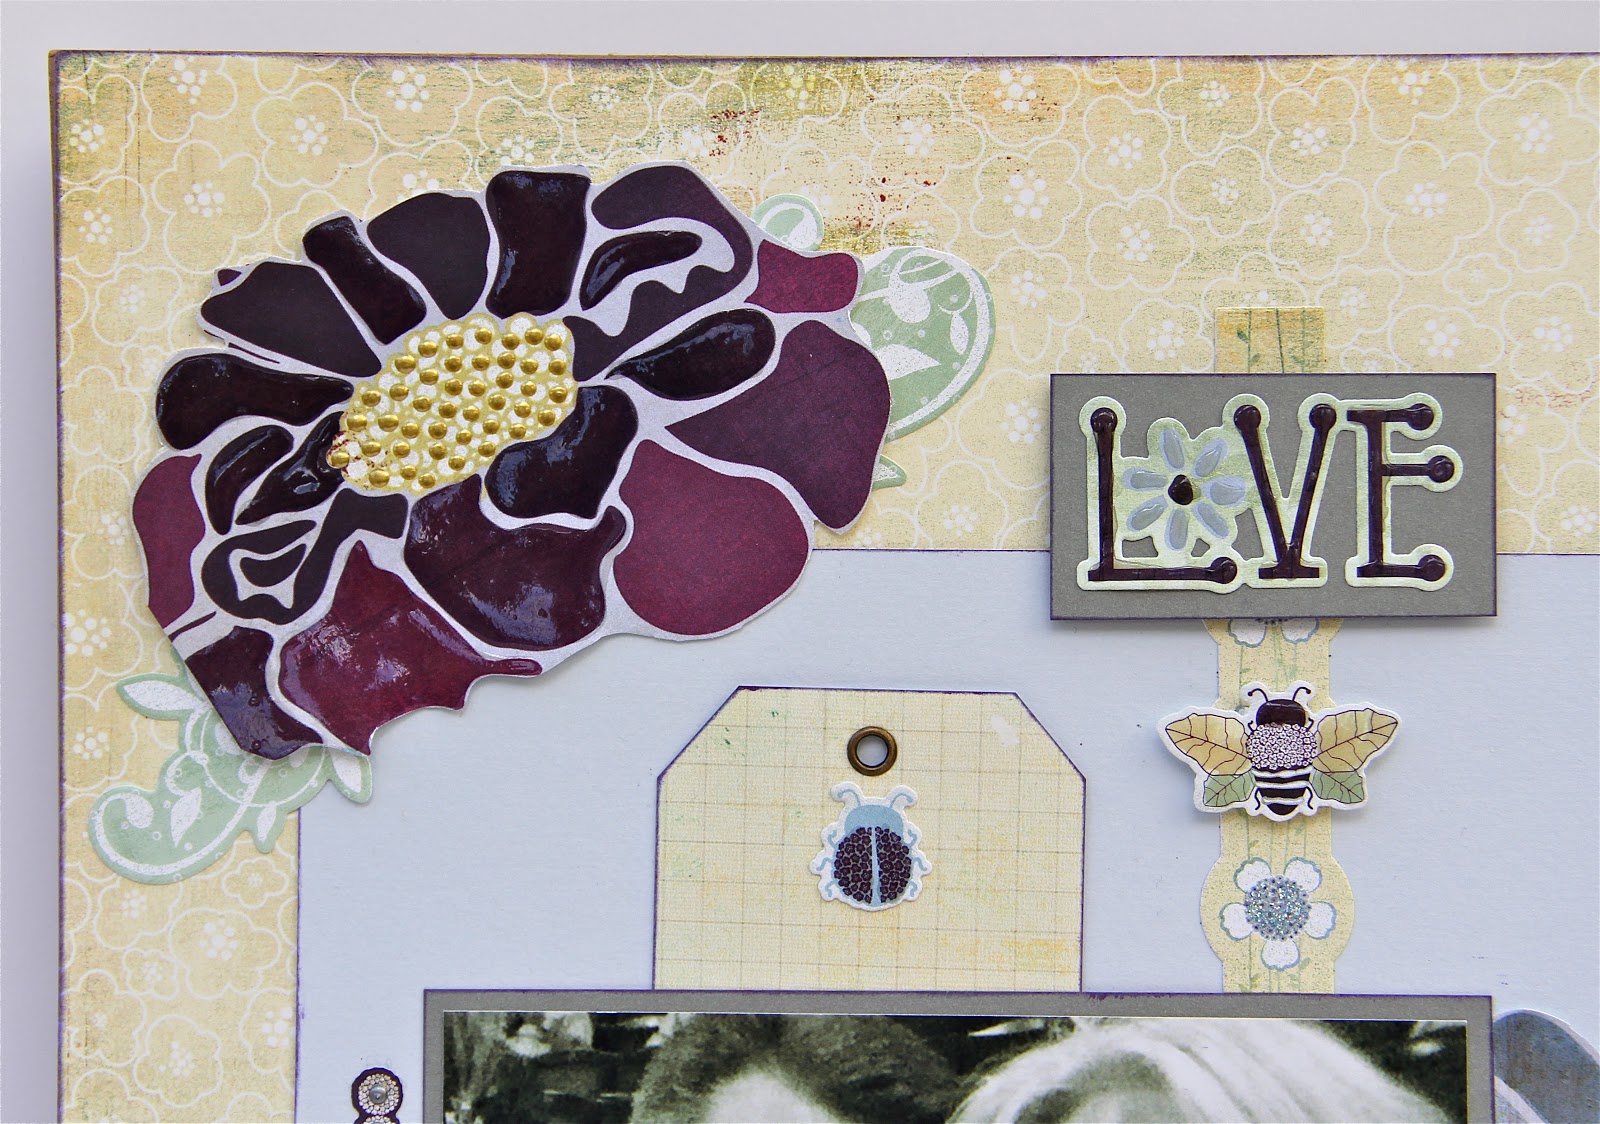
I picked a background paper in a pale yellow and mounted my photo onto some grey and pale blue plain card.


The flowers were on another sheet from the same range of papers and I cut these out, mounted some petals with 3d dots and used glossy accents to make them stand out. Perfect pearls were used on the inside of the stamen. I inked the edges of the papers with purple to match the flower.


I have created a tag and tucked this under the photo so that the soppy stuff can be hidden underneath!


It's not my usual choice of colours or style but I am pleased with the result and for the opportunity to use some papers with flowers, I don't get to use that too much with two boys!

Hope your week is fabulous and thanks for visiting me.

Tracey 
xx

Hexagons

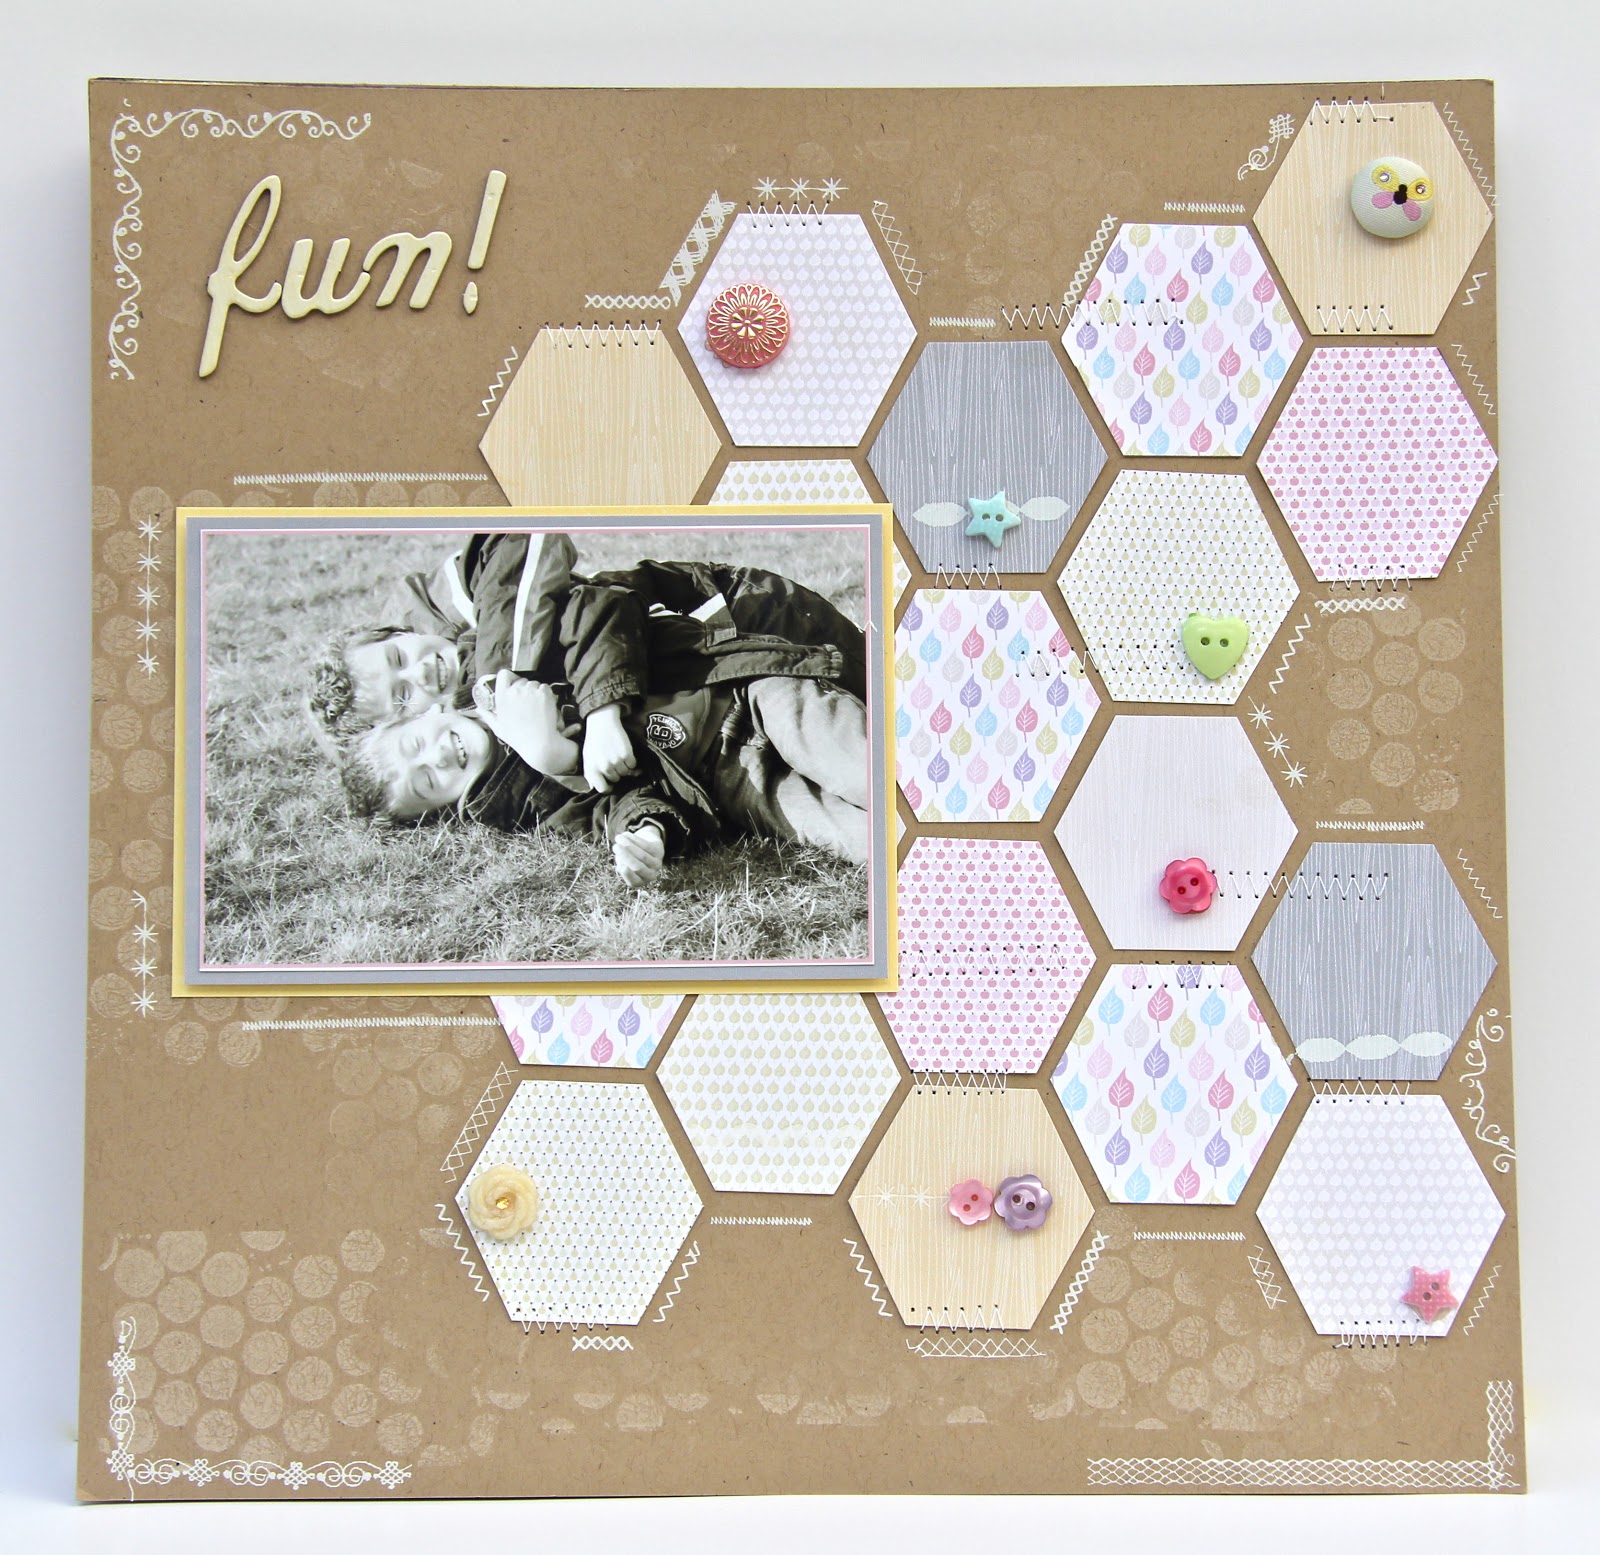
Hexagons are on trend at the moment and I was keen to make a scrapbook page with them.  I used these papers from Pink Petticoat to show an autumn photo of my two boys larking around in a field.


I made the hexagon shape in Microsoft Publisher and then transferred the papers across and re sized them.


I stamped some white circles faintly in white onto the kraft paper and added some white rub ons to the edges of the hexagons.  I also did some stitching with my sewing machine in places.


I added some embelishments, this one made by myself with WOW embossing powders and a flower mould.


And some other embelishments from my stash, I am finally getting round to using them!


I was a bit cautious about using pastel colours on a boys page but it made a nice change.

What do you think? Thanks for visiting!

Tracey 
xx

Butterfly Boy

Hi all, I hope your week is going well and welcome to my new followers, thanks for visiting my blog!

You may remember this post when I spoke about my youngest being Bug Boy, well we did the growing of the butterflies again this summer. He still loves watching the caterpillars turn into a crysalid and then into a beautiful butterfly!

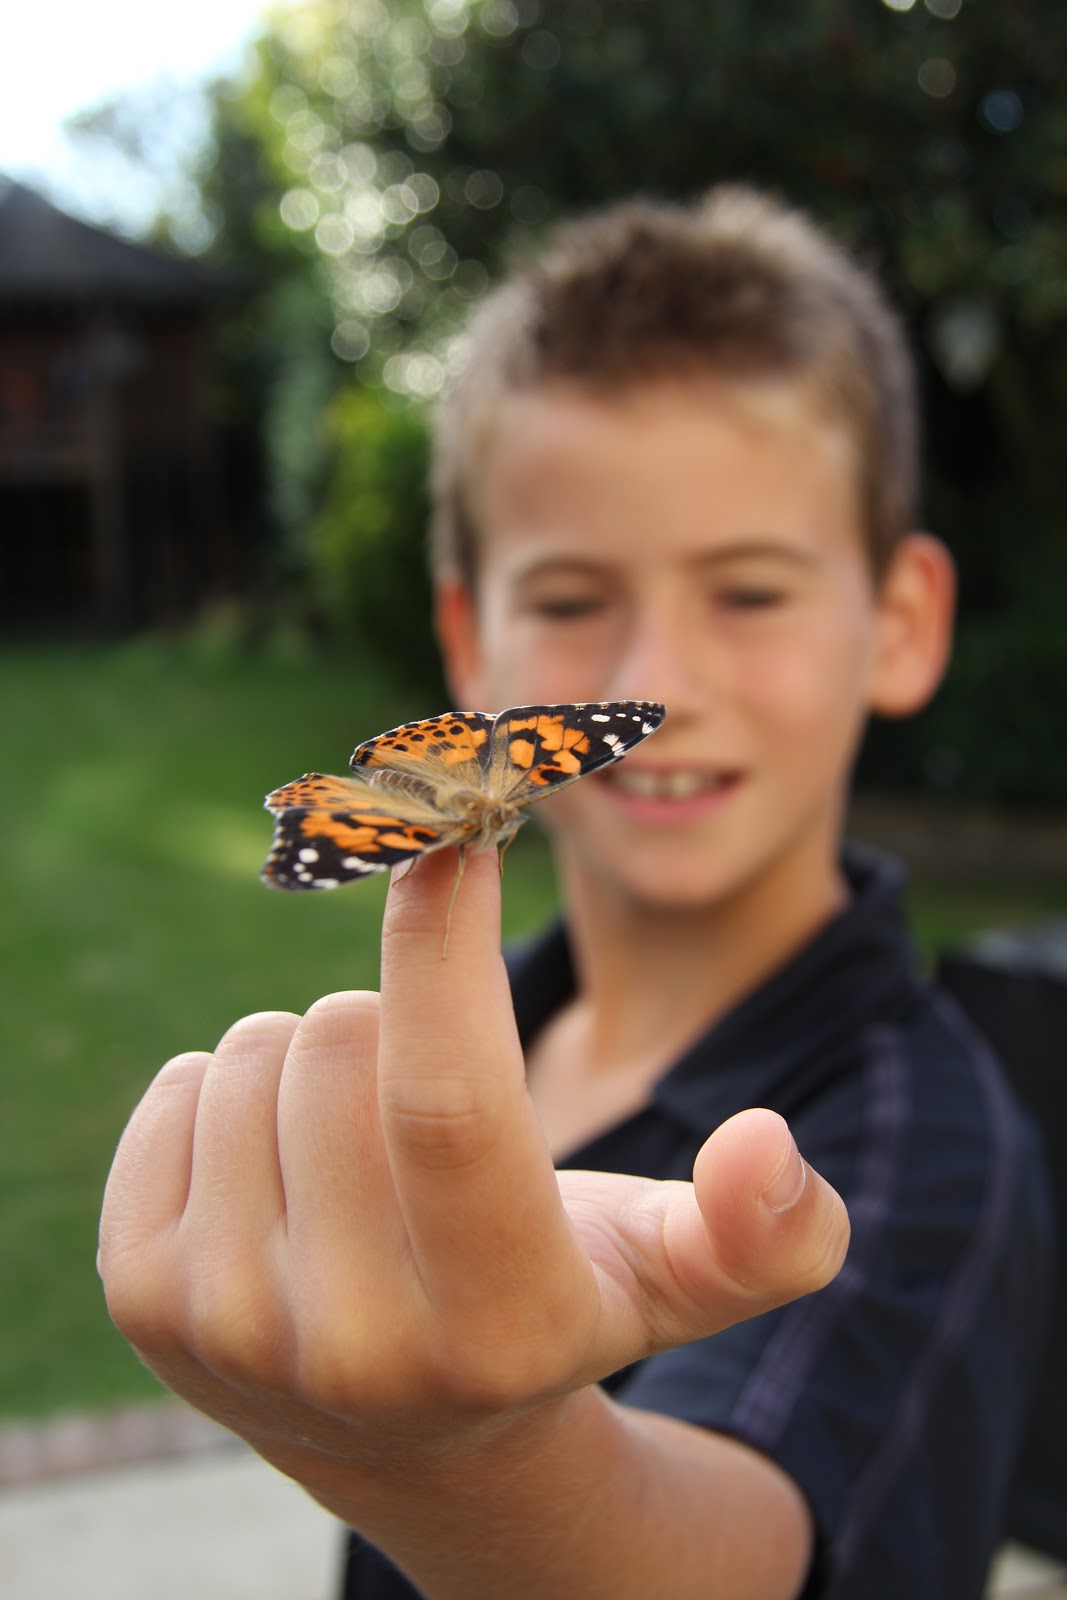
As soon as the butterflies hatch we let them go, only this year, when we took them outside, they were not so keen to come out of their netted habitat.  My son carefully placed his hand inside taking care not to touch their wings, let them climb onto his finger, and then took them out and let them fly away!


I used kraft paper as my base and cut some butterflies out from some Tim Holtz paper. I coloured them with distress inks to match the real butterfly and added some perfect pearls for decoration.


I edited the photo in Picasa so that the photo was black and white appart from the colour of the butterfly. I layered this several times onto black and orange card.


I added a simple border by sewing around the edge with my sewing machine.  Here is the photo of him with one butterfly sitting on his finger!


Thanks for visiting today, have a wonderful weekend,

Tracey 
xx


Websters Pages Digi Card

I love Websters Pages products and I love the fact that some of their pages are digital! I had a special friends birthday recently and wanted to make her a card, I knew which paper I wanted to use, its from the fab Postcards from Paris set here.


I resized the page in Publisher so that it would fit on a square card and printed onto Linen Cardstock.  I added some little gems on the centre of the flowers...


I made some butterflies with my Martha Stewart Punch which I then layered and attached with 3d foam pads. I printed the Happy Birthday in Nuptial font onto linen card stock and layered it onto lovely blue card.


I also needed to wrap her gift, and made use of the digi papers again to create a box to match the card.


I added ribbon, a button in the shape of a bow and cut a gift tag in the same design.


I so hope that she likes it!


Have a great weekend. Thanks for visiting!

Tracey
xx


Halloween Bunting

Whilst browsing through Pinterest the other day I came across this site with free Halloween printable bunting. 

Now there were a million other things I should be doing (and none of them involved browsing Pinterest) but I couldn't resist making a quick Halloween banner to go over our fireplace in the kitchen.


This was such a quick project to make, I simply printed the bunting onto card, and cut it out.


I then added some different trim to the edges of each one...


Some with paper, some with lace..


Some ribbon, I used up lots of left over bits and pieces!


I punched two holes at the top of each piece of bunting and thread twine through it. I printed the circular pictures on the last page and used them to cover up the joins.


I also wanted to turn the fairy lights that I always have on the fireplace into halloween lights. Using an oval punch I punched out five ovals from orange polka dot paper, I inked the edges with some distressed ink and glued them together. I drew the eyes and nose with a Sharpie pen.


I used my Cropadile to punch holes in the eyes and pushed the fairly lights, which do not get hot, through the holes!


Have a Happy Halloween!

Tracey 
xx
Related Posts with Thumbnails