Butterfly Boy

Hi all, I hope your week is going well and welcome to my new followers, thanks for visiting my blog!

You may remember this post when I spoke about my youngest being Bug Boy, well we did the growing of the butterflies again this summer. He still loves watching the caterpillars turn into a crysalid and then into a beautiful butterfly!

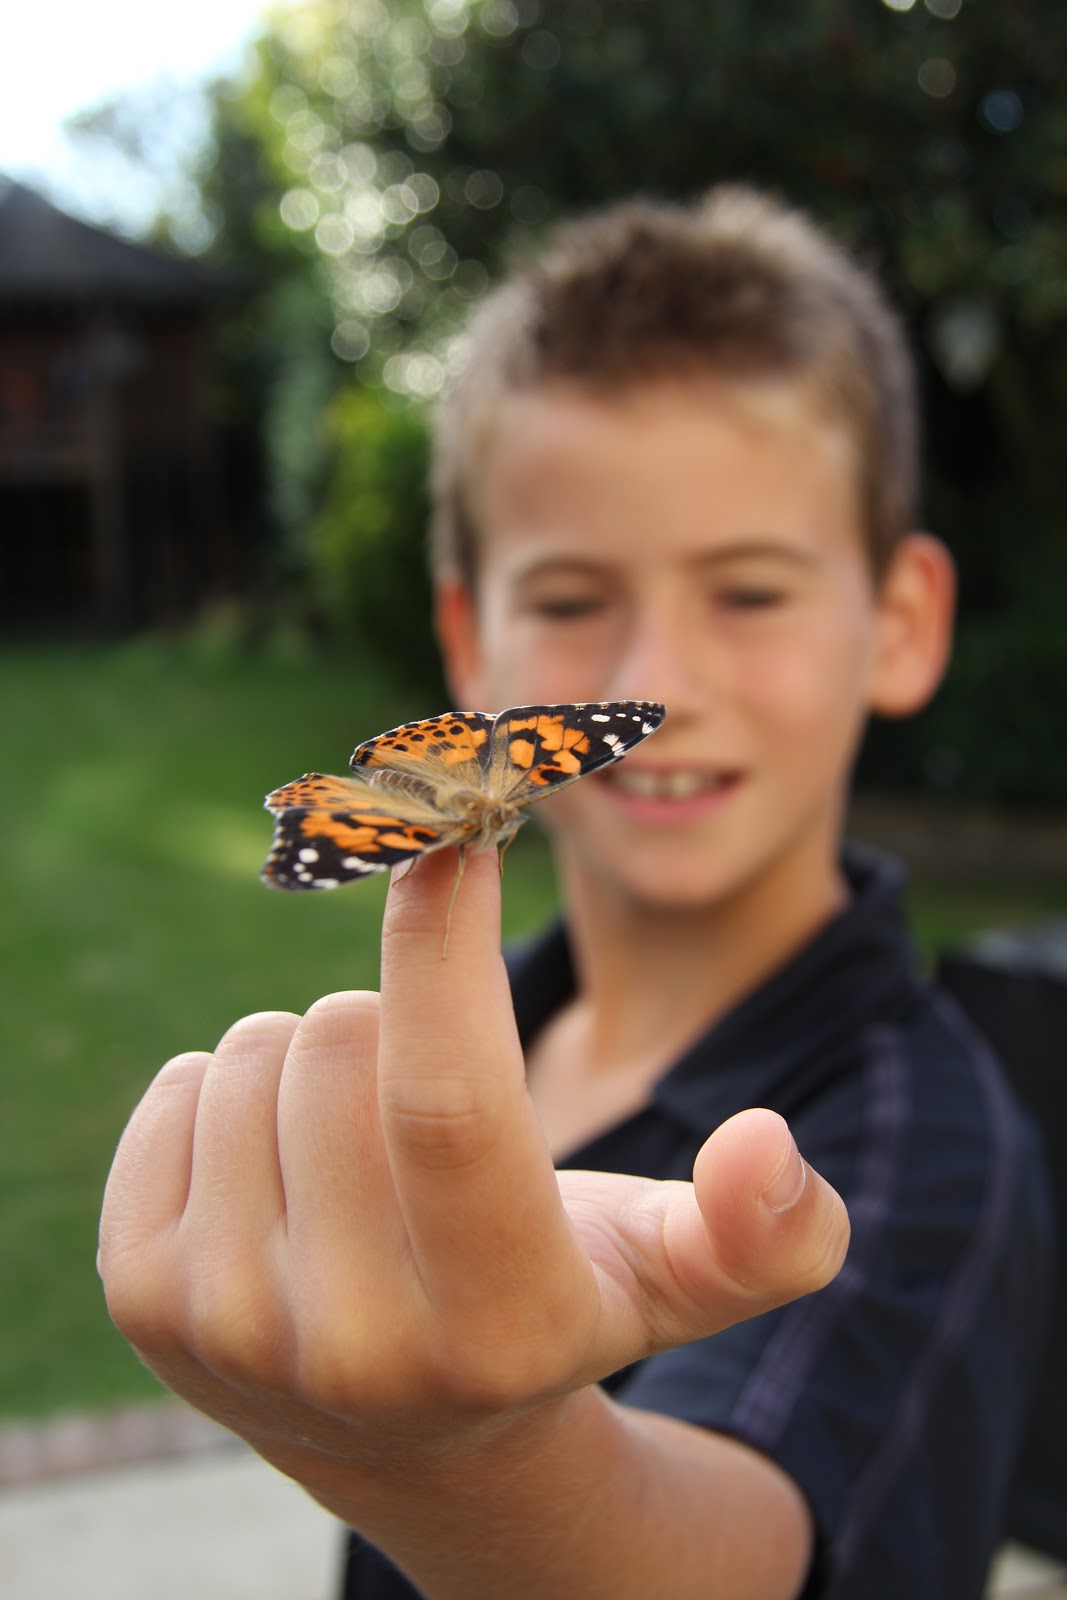
As soon as the butterflies hatch we let them go, only this year, when we took them outside, they were not so keen to come out of their netted habitat.  My son carefully placed his hand inside taking care not to touch their wings, let them climb onto his finger, and then took them out and let them fly away!


I used kraft paper as my base and cut some butterflies out from some Tim Holtz paper. I coloured them with distress inks to match the real butterfly and added some perfect pearls for decoration.


I edited the photo in Picasa so that the photo was black and white appart from the colour of the butterfly. I layered this several times onto black and orange card.


I added a simple border by sewing around the edge with my sewing machine.  Here is the photo of him with one butterfly sitting on his finger!

Thanks for visiting today, have a wonderful weekend,

Tracey 
xx


Websters Pages Digi Card

I love Websters Pages products and I love the fact that some of their pages are digital! I had a special friends birthday recently and wanted to make her a card, I knew which paper I wanted to use, its from the fab Postcards from Paris set here.


I resized the page in Publisher so that it would fit on a square card and printed onto Linen Cardstock.  I added some little gems on the centre of the flowers...


I made some butterflies with my Martha Stewart Punch which I then layered and attached with 3d foam pads. I printed the Happy Birthday in Nuptial font onto linen card stock and layered it onto lovely blue card.


I also needed to wrap her gift, and made use of the digi papers again to create a box to match the card.


I added ribbon, a button in the shape of a bow and cut a gift tag in the same design.


I so hope that she likes it!


Have a great weekend. Thanks for visiting!

Tracey
xx


Halloween Bunting

Whilst browsing through Pinterest the other day I came across this site with free Halloween printable bunting. 

Now there were a million other things I should be doing (and none of them involved browsing Pinterest) but I couldn't resist making a quick Halloween banner to go over our fireplace in the kitchen.


This was such a quick project to make, I simply printed the bunting onto card, and cut it out.


I then added some different trim to the edges of each one...


Some with paper, some with lace..


Some ribbon, I used up lots of left over bits and pieces!


I punched two holes at the top of each piece of bunting and thread twine through it. I printed the circular pictures on the last page and used them to cover up the joins.


I also wanted to turn the fairy lights that I always have on the fireplace into halloween lights. Using an oval punch I punched out five ovals from orange polka dot paper, I inked the edges with some distressed ink and glued them together. I drew the eyes and nose with a Sharpie pen.


I used my Cropadile to punch holes in the eyes and pushed the fairly lights, which do not get hot, through the holes!


Have a Happy Halloween!

Tracey 
xx

My Little Fella

I have been meaning to do a page about my little fella's feet for a few months now. Even when I sat on the tree house with him, I thought I must take a photo and do a page about how much his stripy socks and crocs make me smile.


We had been given permission from his school to take the day off to go an see the Olympic Torch in Southend. We made it more of an adventure by taking the train on the very short journey.  After being offered lunch out as a treat he turned it down saying that he would rather have sandwiches an eat them in the tree house.


At the time we had some decorating work going on outside the house so the treehouse was full of garden furniture, but still we perched on the edge of the steps and ate our feast of peanut butter sandwiches!


I looked at his stripy socks in his crocs and thought how sweet he is and how I love to spend time with him and love that he loves to spend time with me!

Have a great week, what ever you are doing.

Tracey
xx


A lovely Saturday Afternoon

Last Saturday was a great day, we watched our youngest play tennis then we went for a walk along the beach to our local restuarant had a bottle of wine, some yummy lunch and then a lovely walk home.

I only had my i-phone with me so when I saw the beautiful sky I had to take some photos. When I got home I was quite pleased with them!


Did I mention the desserts were good too? 


Good job we walked them off afterwards!

Have a great weekend!

Tracey 
xx

Beautiful Orange

Last week I was at Sugar and Spice taking a class with Nina and she told us that we would be making a card with one of Marion's new stamps called Chevrons.  She got out some orange paper, ribbon and felt and I thought 'Oh No!'

I would never dream of making a card in orange, I don't have anything against the colour, its just not one of the safe colours I use in card making. And this is why the class is so good, because it makes you use things you perhaps wouldn't usually and you may even find that you like it!


I love Marion's new stamp which was also stamped in orange, its great for scrapbooking and card making and very trendy at the moment. Check it out here.


We cut some felt hearts and glued them to paperclips with a hot glue gun.


Beautiful ribbon tied to a paperclip...


Another heart, these can be taken off and used as bookmarks.


I love this card, it has encouraged me to be a bit more daring with my use of colour. Who wouldn't be cheered by a lovely bright card like this!

I hope that you are having a good week.

Tracey 
xx

Quick Thank You Cards

My youngest son had his 9th birthday a few weeks ago and after going to the cinema with four friends, having tea at home with a chocolate fountain and a sleepover (where they stayed up until 2.30 am until I sat in a corner of the bedroom until they stopped talking!) he had to write his Thank You cards!

I bought some from a shop (shame on me!) but unfortunately some got a bit smudged and some were too messy to send so instead of going out any buying another packet I decided to make some.


I used a digikit by Lauren Grier from Sweet Shoppe Designs, I can't find a link so I think it may be retired. 


I added some 3D eyes and added glossy accents.


This is from the same kit, some more cute little monsters!


 More glossy accents added to them.


Such fun and so easy to make, it took me less time than going to the shops to get another packet of cards!


And birthday boy like them too!


Have a wonderful weekend, what ever you are doing!

Tracey 
xx


Related Posts with Thumbnails